This is a guest post by Ricky Sheaves aka n3wkular.
OpenDeck is hands-down the most robust DIY MIDI contoller platform available. I’ve used it to build mixing console controllers for my DAW, dedicated look-alike hardware controllers for my favourite software plugin emulations, and more. But there was one thing I wished it could do even better: integrate with guitar amplifier and effects simulation software like IK Multimedia’s AmpliTube.
So, I wrote that idea up along with a high-level UX design in OpenDeck’s GitHub project. In just a few days, paradajz had implemented and refined it further, and released the new functionality in v7.3.0 of the OpenDeck firmware and the (brilliant!) web Configurator. Now, I am in the midst of waiting for parts to arrive, designing my enclosure, and all the other finish work to build a custom DIY controller with this new feature.
To understand why you would need the new functionality, let’s examine the UX challenges in building a MIDI controller for guitar amplifier and effects similuation software, and let’s use [IK Multimedia’s AmpliTube]: https://www.ikmultimedia.com/products/amplitube5/ as the example.
AmpliTube supports MIDI CC messages to control many parameters in the software; from engaging or bypassing virtual effects pedals, to switching channels on an amplifier emulation, controlling its volume, and so on. Using OpenDeck to control the software in this way has always been simple; you build a hardware controller to act like a physical pedal board and map the CC messages accordingly. Such a controller might have 6, 8, 10 or more “stomp”-style foot switches, and possibly some pots or encoders, providing everything you need to control a “virtual guitar rig”.
However, for many guitarists, the real power in AmpliTube is that it also supports up to 128 user “presets” when in “Live” mode, each defining a unique combination of virtual pedals, amplifiers, cabinets, and rack effects, and all with pre-programmed parameter values. In other words, you can store up to 128 distinct virtual guitar rigs and recall each with a MIDI Program Change message. At first, that might seem like overkill, but I routinely use 20 or more such presets in a single night’s performance, and often 3 or 4 presets in a single song.
The trick in building a controller for this purpose is balancing functionality with usability. I certainly don’t want a controller with 20+ foot switches on it; while perfectly functional, that’s not particularly usable and it’s larger than it should be, in my mind. Just imagine the cover band guitarist that would need 50 or more different foot switches for their setups!
A more elegant solution would be a controller with just a few foot switches that allows the player to “page” through logical groupings of presets, much the same way the octave up/down buttons on a MIDI keyboard controller pages through the octaves. In that UX, a single musical key can send a different note value depending on the currently selected octave. Likewise, on our AmpliTube controller, we could configure any single foot switch to send different Program Change values, depending on which logical group of presets is currently selected; this is where the new Program Change Offset features of OpenDeck v7.3.0 comes in.
The controller I am building looks and works like this (when I complete the physical controller, I’ll update the image!):

- AmpliTube logically organises presets in groups of 4. So, my controller has 4 Program Change foot switches, numbered 1-4. In the Configurator, these are Buttons with Message Type set to Program Change, and their values are 0-3. (I know, it’s a little confusing: AmpliTube presets start at 001 in its UI, but PC#0 for Program Changes. So, PC#0 recalls preset 001, PC#1 recalls preset 002, and so on.)
- The Program Change Offset UP/DOWN foot switches are configured for the new Program Change Offset Increment and Decrement Message Types. The value can be anything from 1 to 128, but I have 4 Program Change foot switches, so I set the value to 4 for both the UP and DOWN foot switches. Pressing the UP button adds 4 to the current offset value, and pressing DOWN subtracts 4. The offset cannot go lower than 0.
- In the mockup image above, the current Program Change Offset value is displayed in the blue OLED display; it’s 04.
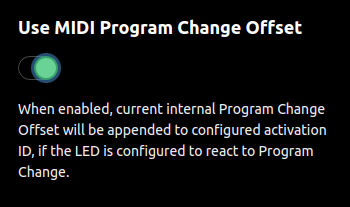
- There are also 4 LEDs: one LED for each of the Program Change foot switches. Since only one preset can be loaded at a time, the LEDs indicate which of the 4 Program Change foot switches was last pressed. In order to make the LEDs use the new Program Change Offset value, a new Use MIDI Program Change Offset option has been added to the LED > Global page of the Configurator.

Using the controller works like this:
- To recall AmpliTube preset 001, use the Program Change Offset foot switches to set the current offset to 00. Then press the 1 foot switch.
- To recall AmpliTube preset 005, use the Program Change Offset foot switches to set the current offset to 04, and press the 1 foot switch.
- To recall AmpliTube preset 011, set the current offset to 08, and press the 3 foot switch.
- And so on.
The pattern is simpler than it might seem; when pressing a Program Change button, the PC value that gets sent is calculated as (Program Change Offset + Button Program Change Value). So, when the Program Change Offset is 8, pressing the 3 foot switch recalls preset 011 in AmpliTube. 8 + 3 = 11. Easy, right?
With some thoughtful organisation of your presets in AmpliTube, loading the one you want at specific moments in your performance should only take a few presses of the foot switches. Personally, I like arranging the presets so that I don’t have to press the Program Change Offset buttons during any given song. (This results in some empty or duplicate AmpliTube presets in come cases, but I prefer the simplicity.)
But Wait, There’s More!
Remember how I said that AmpliTube also supports CC messages to control individual parameters like virtual effect pedal bypass? The v0.1 controller above is only useful for changing presets, but not for sending CC messages. Let’s look at v0.2 of the controller:

Note the PC/CC Mode foot switch and LED. This allows the user to toogle between 2 OpenDeck presets: one in which the 1-4 buttons are configured for PC messages, and the other in which they are configured for CC messages. The LED toggles between red and green to indicate which mode the controller is in. This is extremely useful for turning on and off specific pedals in an AmpliTube preset. The most obvious use is a Boost or Over Drive pedal.
For example:
- In PC Mode, while Program Change Offset is 00, recall preset 001 by pressing foot switch 1.
- Press the PC/CC Mode button to switch to CC Mode, which, behind the scenes, changes the active OpenDeck preset. (NOT the AmpliTube preset in this case!)
- In AmpliTube, if I’ve mapped a boost pedal to foot switch 1’s CC, I can enable it or bypass at any point during the performance. Basically, this enables me to use the controller like a traditional hardware pedalboard.
- To get to another preset from here, use the PC/CC Mode foot switch to switch OpenDeck presets again, and select the AmpliTube preset as before.
To take it one step further, we could add an expression pedal to our controller (with an Analog input set to CC 7-bit and upper limit 127 in OpenDeck), and control our wah or volume pedals (or any other param!) in any given AmpliTube preset.
Really powerful stuff. And the v7.3.0 OpenDeck firmware makes it all possible for DIYers!
Cheers and be well!


