

This is the last post about Anandamidi, I promise! So, in case you forgot, this is the remaining stuff to finish the controller:
- Painting the case
- Interfacing Arduino with separate USB MIDI chip on separate PCB (Altmustech AU-123)
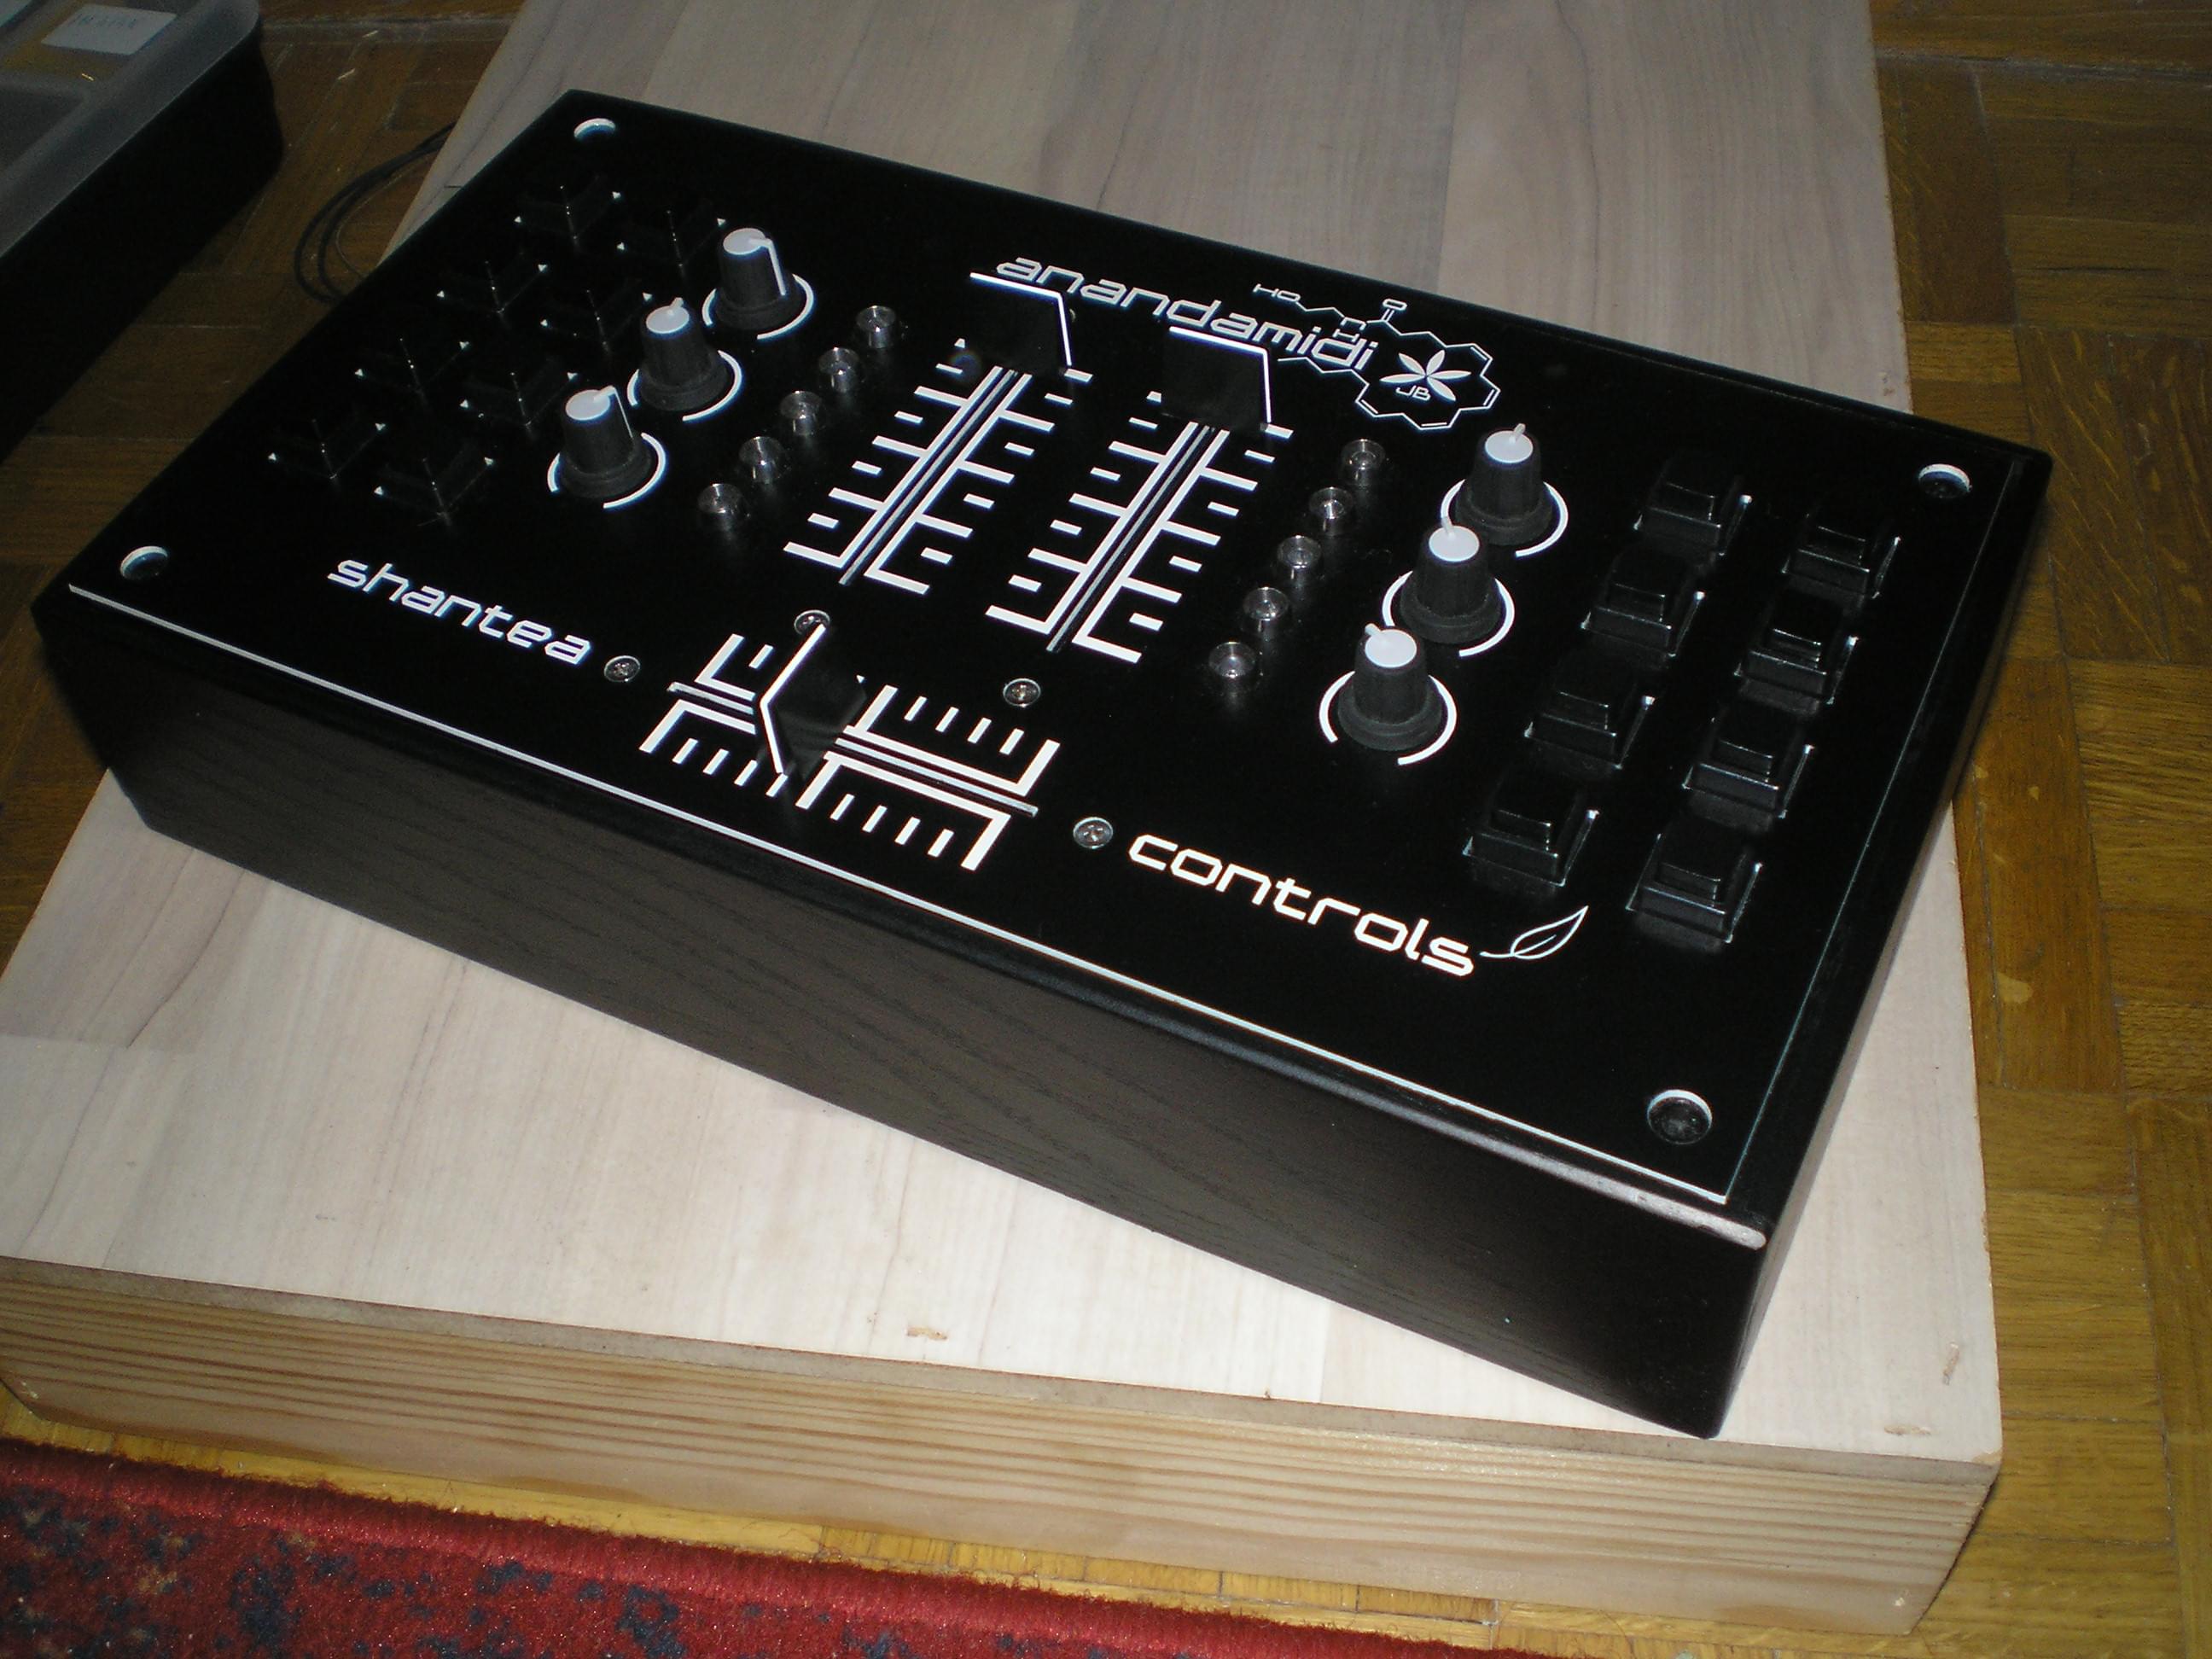
Painting the case
Fairly easy part. I’ve simply bought black spray for wood and sprayed the case 3-4 times. Looks really cool!
Thing I haven’t mentioned before is the cable plate and the cable itself. I bought several of these USB cables off eBay: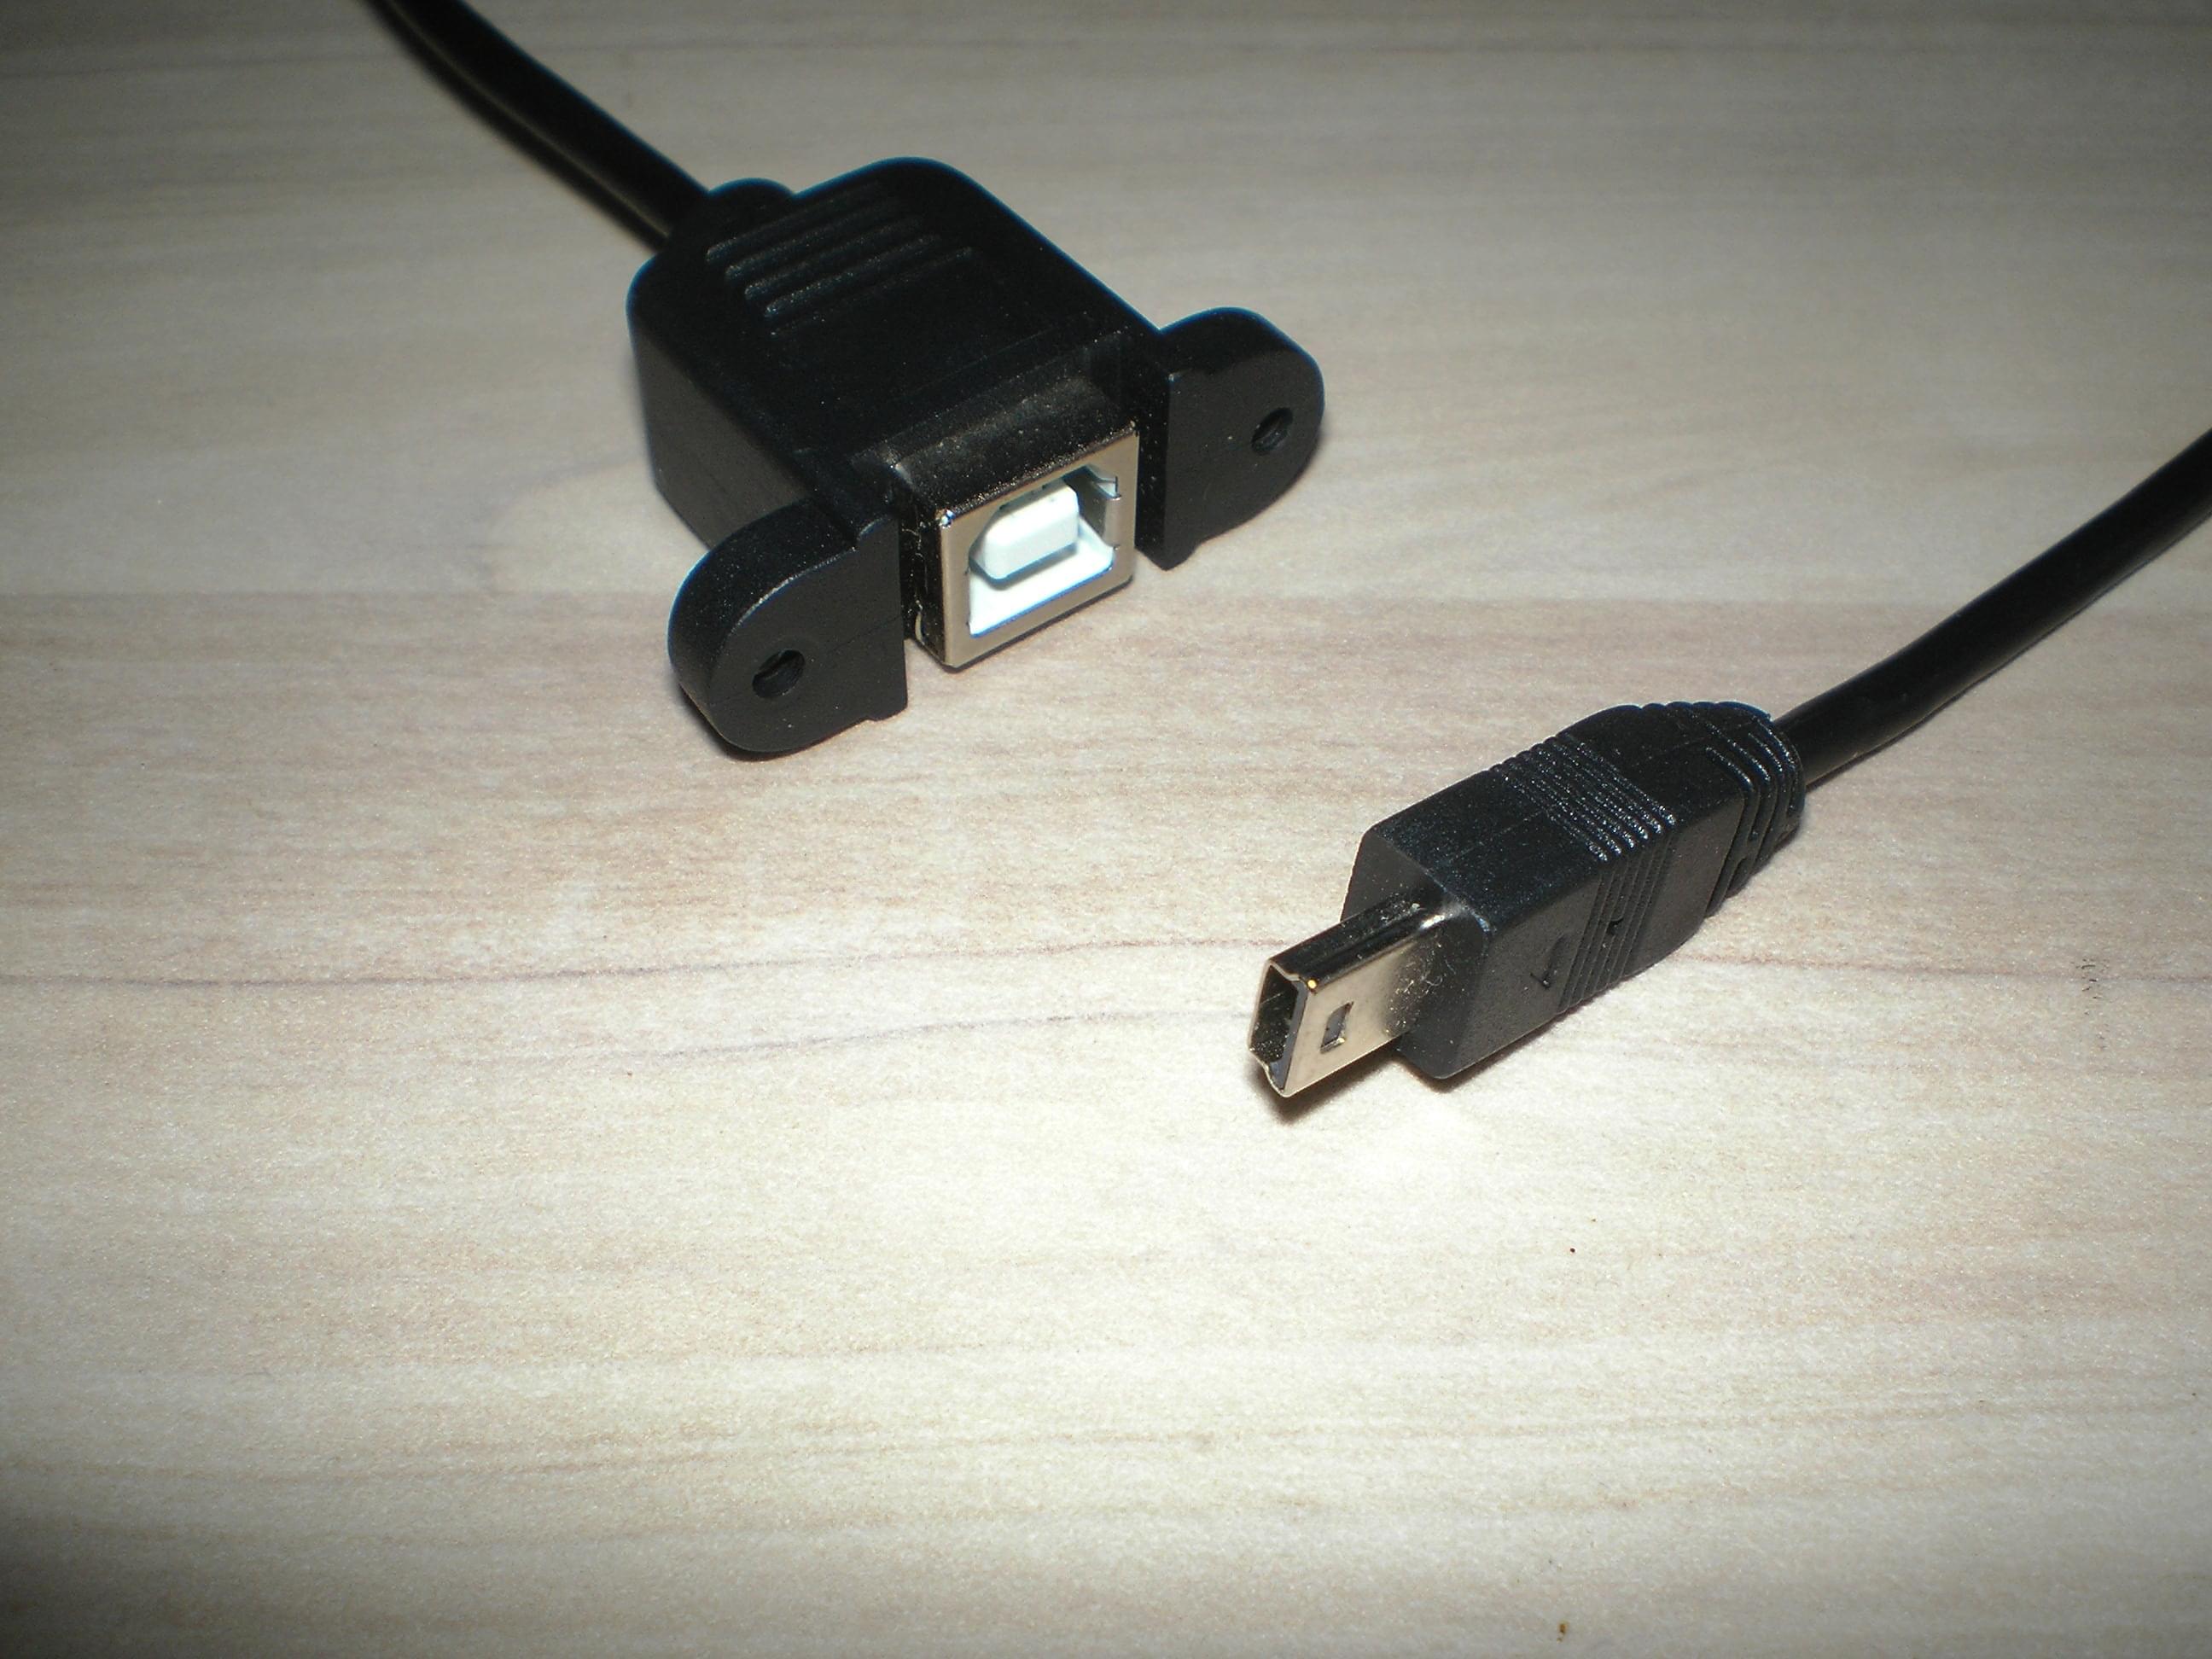
I’ve cut off the mini-b part of cable and replaced it with 4 cables with female headers on them, so that I can simply plug it to USB MIDI or serial conversion board. Since just screwing that cable directly on wooden case would look rather ugly, I’ve also designed a cable plate board, made from same Gravoply board as the main plate.
 Much nicer, although I’m not too happy with screws on that plate (I haven’t had anything else). Right, let’s move on to #2.
USB MIDI board
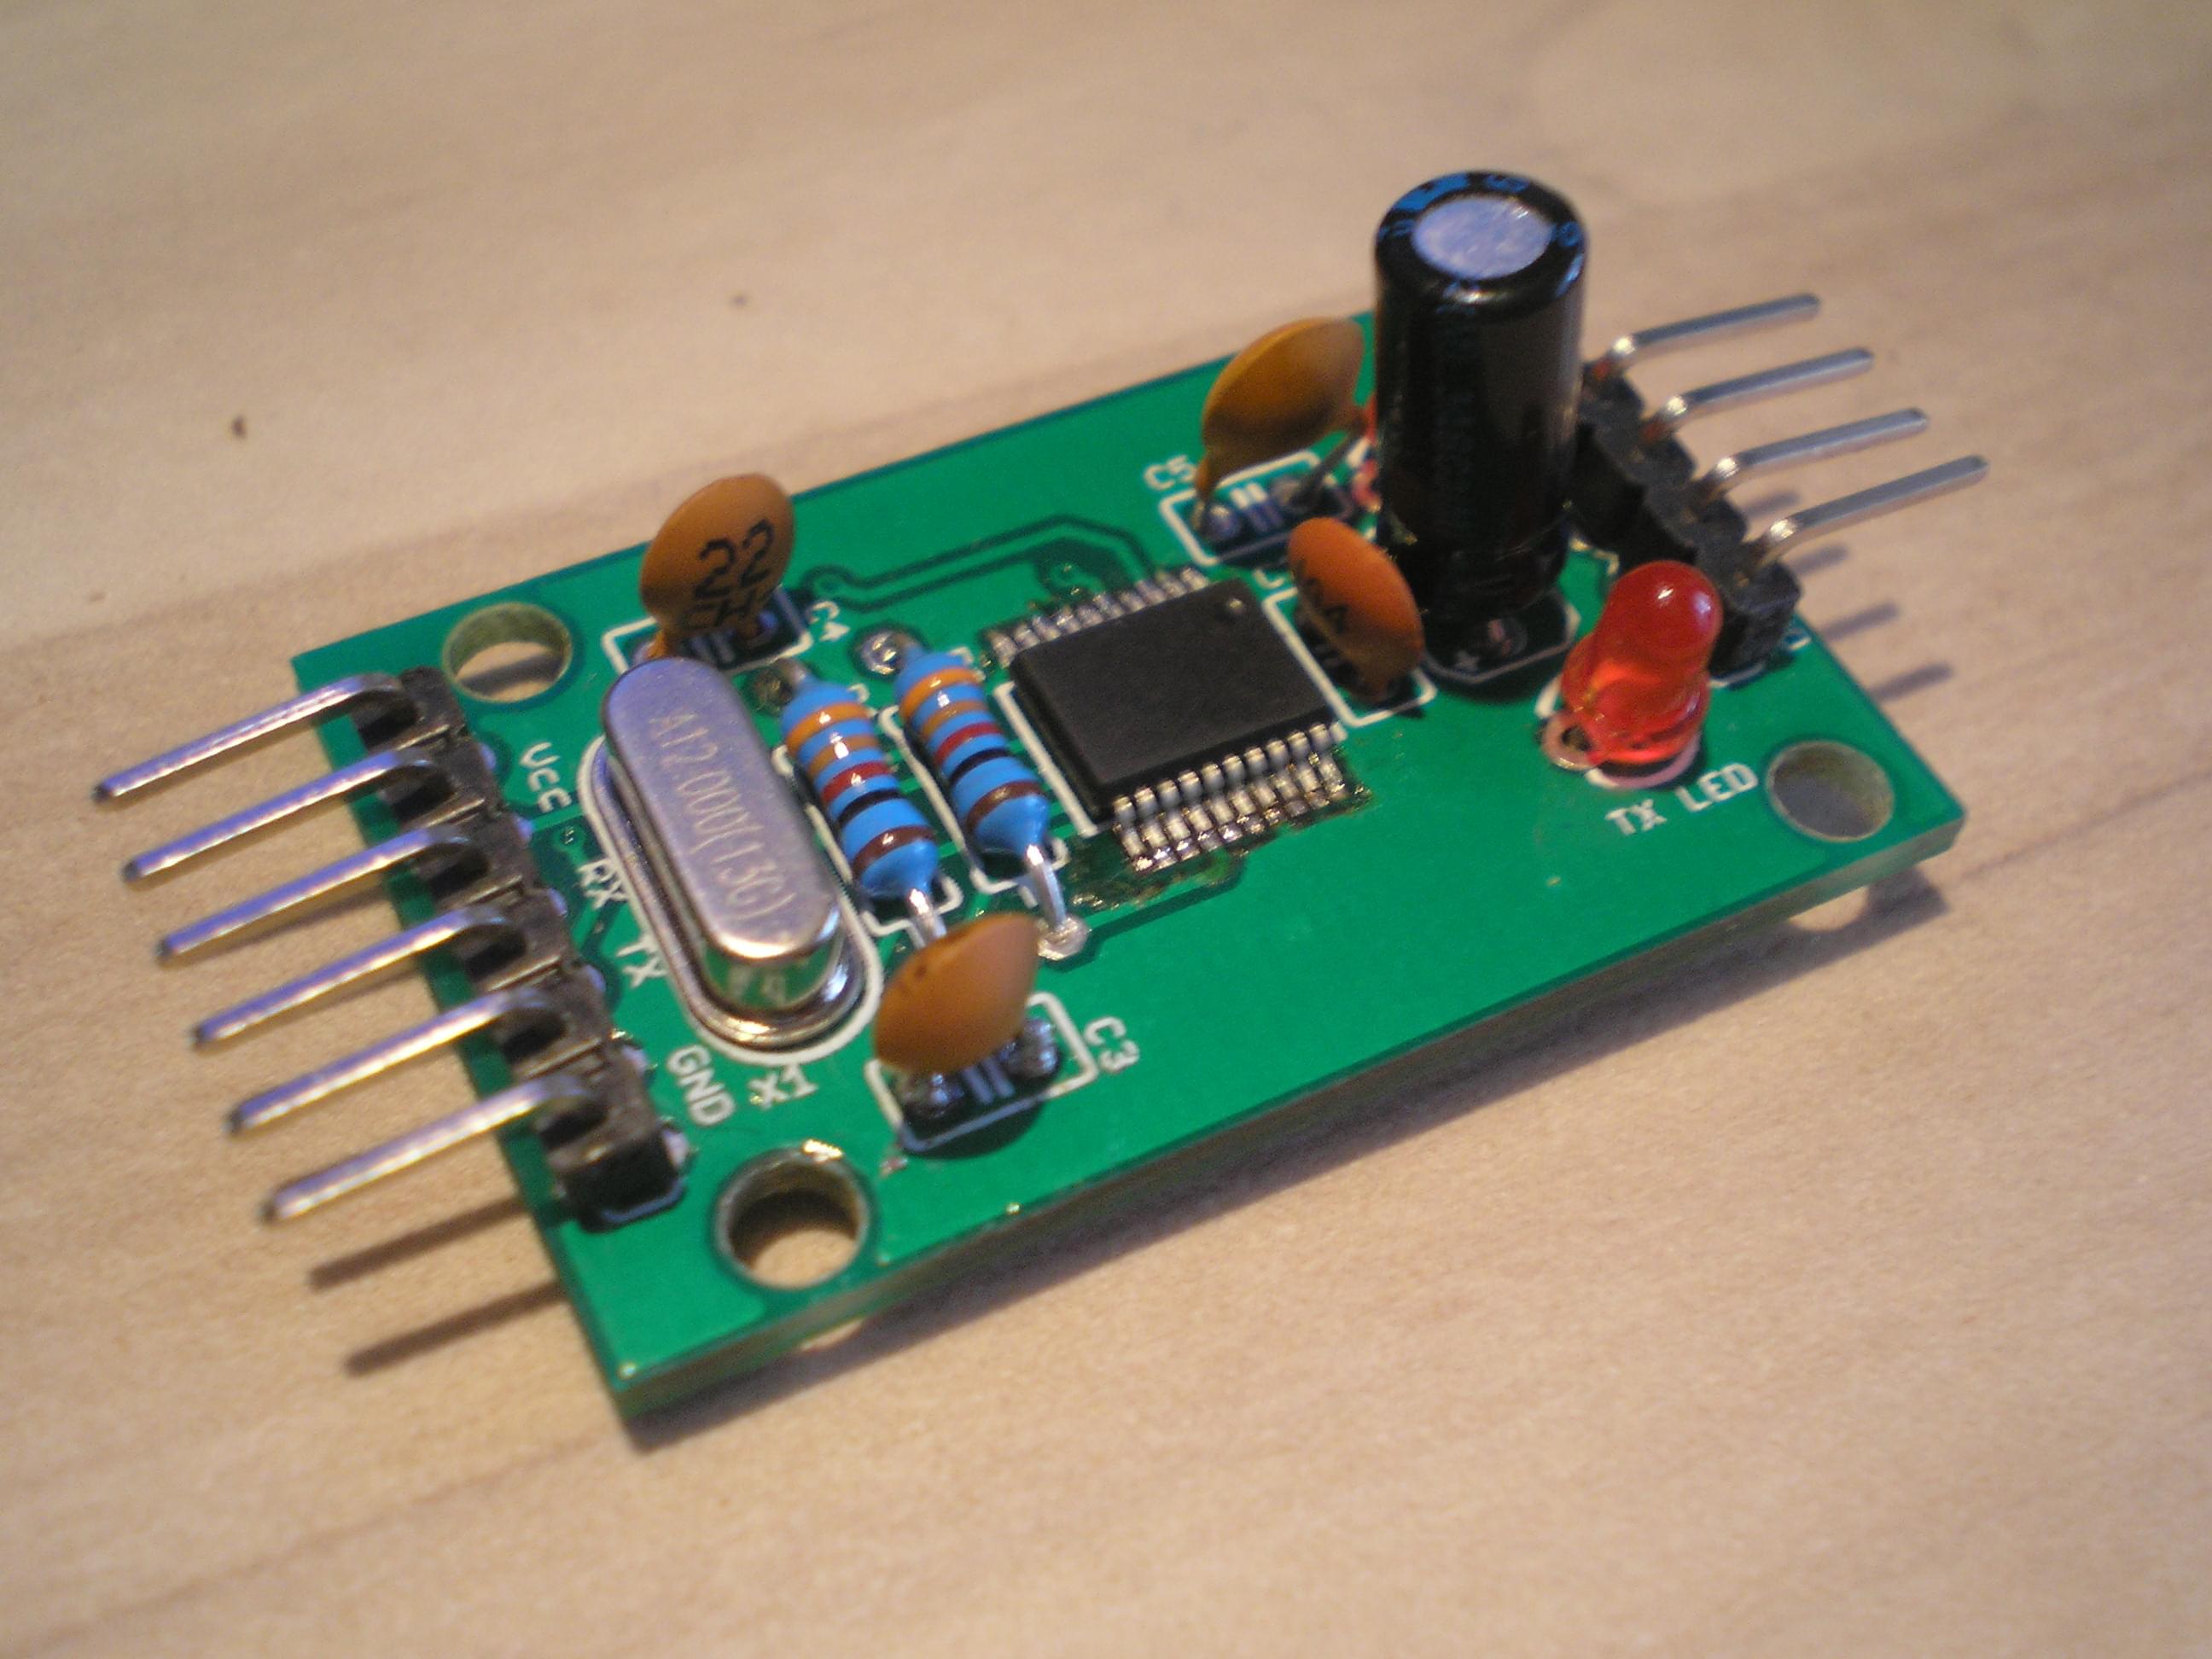 There were more than several issues with this thing, as usual. After I received the PCBs, I asked a friend to help me solder that MIDI chip, since I’ve never soldered SMD component before, plus I don’t have necessary equipment for that job. After we soldered everything, connecting the board to PC did nothing. No errors, no anything. Checked everything few times, but I couldn’t find the error. Grrr! Since that didn’t work, I’ve decided to give the controller to the guy for whom I was building it without that board. Instead, there’s simple CP2102 serial module inside the Anandamidi at the moment. Everything is the same, except that way you need to install drivers (atleast if you’re on Windows), install virtual midi port and an app which converts serial messages from Arduino to MIDI. Couple of extra unnecessary layers, but it works without issues. After I got home, I spent few more days trying to figure out where I did mistake. Eventually, I figured I used capacitors far too large to be put in parallel with 12MHz crystal which MIDI chip needs. I bought 22µF tantalum caps, simply because the official documentation said only “22” for two crystal caps, so I assumed they meant microfarads. Did I mention how expensive tantalum caps are? Very. Tantalum caps are very expensive. Oh well. What I needed was 22pF caps, so after I bought them, suddenly everything worked. Hooray! Windows happily reported it found new USB MIDI device. Awesome. Unfortunately, issues didn’t end here.
Testing the board
For first try, I only connected TX pin from Arduino to RX pin to that board, so I was only able to send data from Arduino to PC. It worked without any issue whatsoever, so I assumed sending MIDI data to that chip would work as well. Wrong. I’ve tried to send some MIDI messages to Arduino via that chip, only to get some gibberish values. Checked everything more than dozen of times, didn’t find anything wrong. So, I went back to reading the AU-123 documentation (after things don’t work, RTFM, right?) and noticed something interesting:
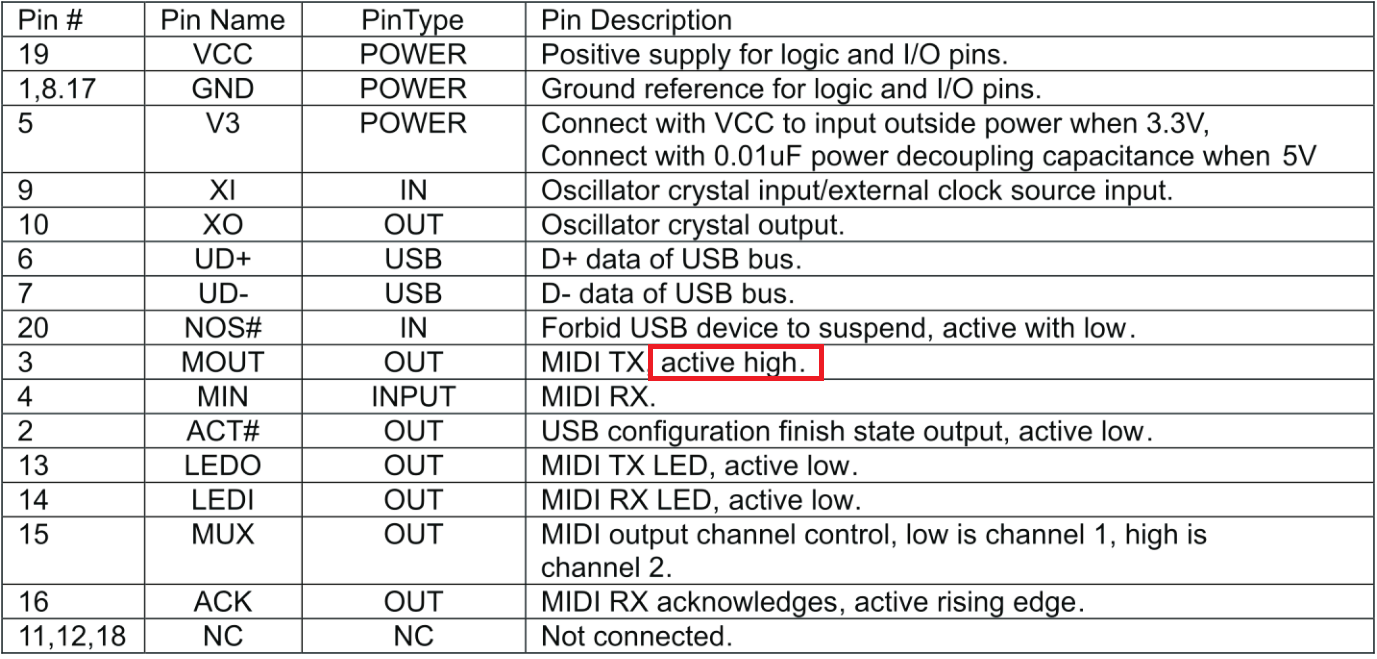
Active high? What the hell is that? Apparently, pins on microcontrollers can be either active high or active low. Active high means that HIGH signal (usually +5V) represents binary 1 and vice versa. Active low is exactly the opposite: +5V signal represents binary 0 and 0V represents binary 1. After some more investigation, I learned that USART pins on AVRs are active low, meaning that I need inverter if I want to interface them with active high signals. That was also the reason I got gibberish value on Arduino end without the inversion. Obviously, there’s more than several ways to invert digital signal. First I tried with NAND gates (74HCT00 chip) - worked! I simply connected one input of single NAND gate to +5V, and other input was the TX pin from AU-123 chip. Output from gate was inverted, so I connected it directly to Arduino RX pin. While this solution works, that chip contains 4 NAND gates and has 16 pins, and I only need one input on gate, so it’s a waste of chip. Instead, I went with transistor solution (2n2222):
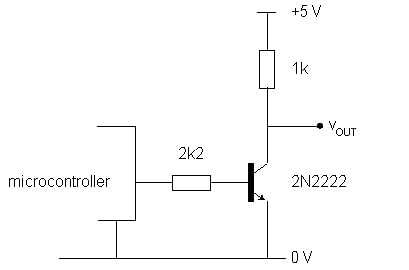
Really simple schematic and works just like the NAND gate solution. Finally, the MIDI USB board is fully fuctional.
Controller demo
Since everything works, here’s a video with Anandamidi, and my first controller, Tannin. Note that this was recorded before the case was painted. Enjoy.